Showing posts with label sewing. Show all posts

Sunday, May 1, 2011

For the Love of Tees

by Kimberlee

I'm sort of obsessed with t-shirts.  I realize this makes me well, ordinary, but what's not to love?  Now that Spring is finally rolling around (more or less), I've been bookmarking, circling, sketching and planning several projects & products centered on tees.

I'm sure you are all familiar with the Generation T series.  I've had both of these books even before I had a sewing machine!  Unfortunately, I haven't made many projects from them, not because I don't LOVE them (because I do), but because I can't cut up any of my beloved tees.  I went out and bought a bunch of tees from Goodwill after I first got my machine (the older one which has since gone to that great Tailor Shop in the Sky), but being inexperienced managed to mess up everything!  Such is life.  But I'll get back to this.

So, as I said, lately I've been running across a lot of tee projects and tees themselves that I lurve so much.  One thing I have been putting many of my loved but not really worn (due to size or stains or whatever) tees aside for is a Tee Shirt Quilt.


I have several bookmarked pages for tee quilts:
How to Make a Tee Shirt Quilt
From Goose Tracks
Craft Stylish

And, of course, there are also quilt projects in both Generation T books.

I have to think this is a pretty good way to get started quilting, too, in addition to it being on my list of Re-sew-lutions.  I'd absolutely LOVE to hear from anyone who has made a tee quilt.

via Whole Living


I know you've seen these around.  I adore them, and can see making them even prettier by adding beads or washers.  This would be a great way to use up the scraps from the quilt project if you don't have any tees lying around and, unlike me, don't hoard them.

A GREAT site for inexpensive tees is Threadless.  A wonderful friend of mine introduced me to Threadless by sending me a gift of tees, and I have been smitten since.
One of many cool tees

What I love about this site is that you can also submit your artwork to be on a tee, and even make money from it!  I've never been able to work up the nerve to submit one of my paintings, but maybe someday.

I've recently begun to think about making some clothes out of tees, a la Generation T, but with my own patterns.  One of the things that keeps me from sewing as much as I want to is the cost of fabric, and that it is difficult for me to find fabric I like for clothing.  I have this combination of traits - I'm incredibly picky AND tend to become easily overwhelmed - that can make life difficult at the fabric store.  I lean toward simple, solid or classic patterns and like cotton or jersey.  Anyone who has spent any amount of time in a fabric store knows how difficult it can be to find clothing fabric like that, at least at a decent price.  Hence the attraction with working with t-shirts - they're affordable (a package of 5 men's for 10 bucks), easy to dye, silkscreen or paint, easy to sew, and they self-hem.  I like the loss/risk factor, especially with experimentation.

So like I said, I've been thinking about this, and the idea has been growing on me so much that I've sketched out some clothes that I think will be great made out of tees.  Keep in mind that I'm self-taught, so go easy on me.  I've never shared any of the stuff out of my workbooks...

formerly top secret
I think my winter petticoat might be awesome remade with tees, in much the way that Britt from Sneezerville did it.  What a perfect summer skirt!  And on the subject of ruffles, this would similarly be great to make:
Weekend Designer
So what do you guys think?  Do you have any favorite tee projects?  Alternately, do you also have trouble finding fabric that you love to make clothing out of?  What are some of your sketch projects?

Scrabble has also been working on some designs she'd like to show you

Monday, February 21, 2011

Tutorial: Optimizing Miniature Upholstery Using Fusible Web

Magpie Shinies readers will remember that a few months ago I shared some of the fabrics that were going to become upholstery and other soft furnishings in the inch-to-the-foot scale Georgian Manor House which is the craft project looming largest in my life right now.

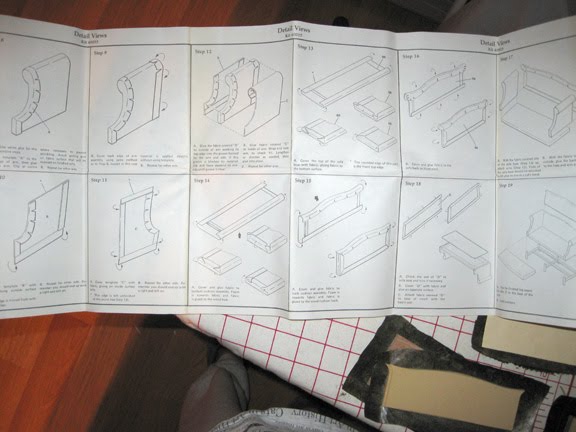
Well, with what we'll call a "budgetary lull" preventing me from doing any big things like flooring or lighting for a while, I thought I'd finally break out some of those old House Of Miniatures kits that I'm reworking for the bulk of the remaining furnishings. At pennies on the dollar they'll allow me to furnish the house in the style it deserves, but on the cheap compared to store-bought new miniatures for All. Those. Rooms.

In the process I discovered a terrific approach that I thought merited a tutorial, since it's a technique that I think has many potential uses beyond building miniature furniture.

A little history: House Of Miniatures, and indeed dollhouse miniatures as a hobby, peaked in the late 1970s and early 1980s. They had a full line of furniture kits from simple nightstands and tables to elaborate hutches and fully upholstered chairs.


You'll remember I declared that I was going to replace their default fabrics with some beautiful bits of silk I'd acquired, as indeed I did with my first upholstery effort, this Chippendale wing chair.


Because, there's no comparison between those results and what it would have looked like had I gone with the plain, drab blue cotton that came with every kit.


The project I'll document is the complementary Chippendale sofa. The first step is to press the fabric thoroughly with your steam iron.


Next, I'll apply fusible web - such as Heat-N-Bond - to the reverse of the silk.


In this case I started with one section, but ended up having to apply fusible to the whole length in order to meet the "seam allowances" for everything required. Be sure to set your iron to DRY for this process.


When cooled, peel away the paper backing and you'll see where your web, just like the wrong side of fusible interfacing, is ready to attach your fabric to whatever you need.

Next, I consult the part layout provided in the instructions and identify all my pieces, both the wooden structures and the cardstock cutouts that make short work of some of the more delicate bits.


The kits requiring upholstery include foam for the cushions, usually glued to a wooden base. In cases where the contents seem to have deteriorated too far to be reliable - remember, most of these kits are 30+ years old already, probably stashed forgotten in someone's attic until rescued and popped on eBay - I re-cut new foam from materials you can find at any Michael's or similar craft supply, but since these look well-preserved I'll go ahead and apply them as instructed. I do add another step of my own before I actually cover them...but I'm getting ahead of myself.


Now I take all my pieces that require covering with fabric and lay them out on the fabric + fusible web length, identifying the optimal position for each to economize on the fabric but still ensure I have enough allowance for the wrap-arounds required.


The next step is to cut them all out. In the instructions it will tell you to glue the cardstock templates, specifically, to the fabric. This is one of the steps that the magic of fusible web allows me to avoid for everything but the smallest pieces like the front of the sofa's roll-arms, to which I apply just the tiniest dab of glue to hold the template in place for cutting.


Now, cutouts complete - to the instructions! Back in the 80s, this would all be about the glue, glue, glue: apply the fabric templates to the parts, clip curves where you need to, and then find some kind of creative way to hold it down and WAIT FOR IT TO DRY. It would take forever...probably why the only kits I ever constructed before this were all wood and no upholstery. Contrary to popular opinion, I'm not very patient at all.


But it's 2011, and I have fusible web on my fabric. I knew, from past experience making fabric-covered puzzle boxes, that it could easily and tidily bond fabric to cardboard. So, I thought it stood to reason...why not to lightweight wood?

Job one is to break out my hand-held craft iron. You can't do close work like this with a full-sized iron, but a craft iron like this one from Clover - essentially a flat-paddled soldering iron with an adjustable temperature control - is perfect for this scale of project. Two important caveats for a tool like this: one, be sure to use the supplied stand to rest it on when not in use, or it will burn through your ironing board cover just as surely as your full-sized iron would; and, two, be very careful of your fingers whenever you need to hold down bits of fabric as you apply the iron for fusing.


I'll start with the fiddliest bit: the tops of the roll arms. A little glue attaches the lightly pre-glued template + fabric to the arm, and I hold it precisely in position.


Starting in the middle of the curve, I fuse the clipped edges to each side of the arm to hold them more or less in place while I continue the fusing process. In general I've found it works best to fuse the clipped curves first, before the straighter edges. It works brilliantly....and the best part is, I don't have to go and do something else for a few hours while waiting for glue to dry! Once the fabric and wood cool - a matter of moments - I can continue working with the same piece and move on to the next step. (Apologies for the blurry photo.)


The back of the arm is even easier. I can fuse the template - all fabric + web, no cardstock - directly to the wooden element before I start on the curves! No muss, no fuss, and wonderfully clean results, with sharp lines and no bleed-through from using too much glue.


For the larger cardstock templates, I begin by using the hand iron to fuse the fabric thoroughly to the cardstock, fabric side up. Be sure to do this right in the center of the template and leave the edges for later, or you'll risk fusing your piece to your ironing board.


When it's time to fuse the foam-covered "cushions," I want them to be a little less spartan than the original, so I add one layer - only one! - of lightweight quilt batting. I find this gives me the "cushier" look I want without adding so much bulk that the components, which really are very precise, no longer fit together well.


After a couple of hours' work, all the components have been fully fused and are ready for assembly - a much quicker, simpler and more precise job than it would have been back in a glue-based world.


And at the end of my evening's project, all that remains for the next day is to finish the legs and glue the upholstered sofa to the base.


A few general hints for working with fusible web, if you haven't before:
  • Sometimes, especially when you're adhering fabric to another bit of fabric that's already been folded over and fused, the bond doesn't want to immediately "take." Apply some pressure to the desired point with your fingertips until the fabric cools a bit, and the bond will usually hold.
  • For cardstock templates, pre-clip to the edge of the cardstock for your curves. When working on wooden assembly pieces, first fuse your fabric to the wood, and then clip as you go.
  • Keep any extra bits. You may have dining chairs or benches you want to upholster to match, later on - I know I do!
  • Don't put the craft iron away when you're done with a project like this. They're very handy when you want to achieve a really precise point on a collar or a cuff.
I've been busy with soft furnishings for the Manor, too - next time, I'll share with you some of my results in a non-tutorial gallery!
Monday, January 3, 2011

New Year's Re-sew-lutions

by Kimberlee


One of the things I have trouble doing if finishing a project.  I'll get discouraged and put it away, then start something new, or more likely become excited about something new!  So here are my Re-sew-lutions for sewing that I will finish this year.  It should be interesting to see what I manage to hold to.  In no particular order!


This is Butterick 5398, one of the first patterns I bought and possibly the best bang for the buck (literally, it cost a buck), considering it is an entire wardrobe.  I've tried to make the very easy dress a few times - once I was short on fabric after I had cut the rest, once I cut all the fabric but it fell apart during sewing, etc etc.  But I love these designs, and want to do them all (in the same colors, too) as the patterns - except for the pants, which are no great shakes.  I also want lime green flats now, too.

The Yellow One from B5045. I don't know what it is about how the yellow is cut, but it looks super comfy.  I want to make it out of some fabric that is both casual but fancy at the same time, and I'd be happy to take ANY suggestions!

Something awesomely retro. I have yet to make a retro item (Ren Faire notwithstanding, but possibly too retro), but I really want to make something that looks straight out of a classic movie.  I love these robes(B5152), and I'd get a lot of use from them, as I practically live in pajamas. It would be really cool to make a fabulous retro party dress, too, which brings me too...

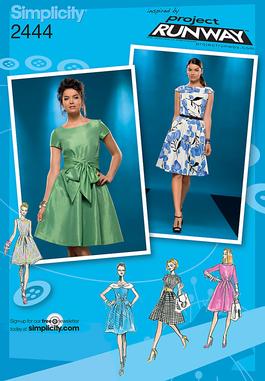
I've had this pattern, Simplicity 2444, for a very long time as well, but I've been waiting for a dress form to finish it.  Now that I have one, and a muslin for the bodice, I'm excited to make a custom fitted party dress.  The PR patterns are a little funky, more exactly the instructions are, and were definitely too much for a beginning sewist.  I'm making the pink dress in the drawing, as I'm not a "huge bow" kind of gal.  More power to you all who are, but it's not how I roll.


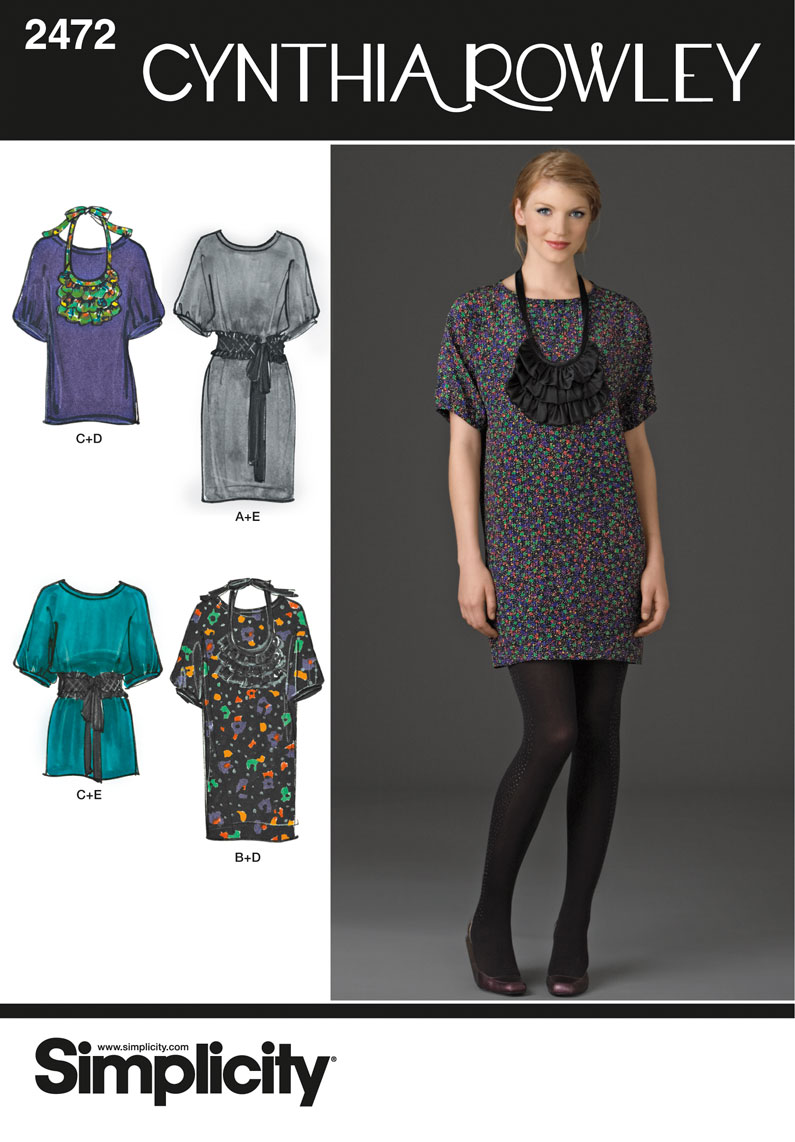
This dress should be easier but I may be cursed.  S2472 is a dress/tunic option with a really cute belt.  Like, supercute.  Why did mine wind up looking like a tshirt and why are the instructions for the belt mystifying? I'm open to any fabric suggestions!  Much like this pattern, the next re-sew-lution is mostly made:

I was into capes before anyone else.  One of my most beloved pieces of clothing is a poncho/cape I bought at Top Shop for 50 lbs (when one pound = 2 dollars!).  I knew it would be a while before I was on a High Street again, and it was so perfect and army green, and then I had to go get cash out because there's some chip in English credit cards that American cards don't have, etc etc. But this was over 3 years ago!  Now I want to make this cape, and C (the blue one) is at home, all cut, but for some reason there is no lining, and without a lining it has about a two week wear-season here in MN.  So I created a lining which I have to figure out how to put in, and want to make a hood to go with it.  I don't know how to make a hood, so I have been studying the hood on my beloved cape like crazy, hoping to match it.


A great pair of pants.  I'm terrified to make pants.  I just don't know how to.  Before the end of the year, I will make a pair, learning how to...


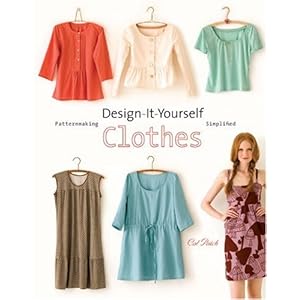
...by following a book learning course.  This wonderful book, which was on my Amazon wishlist and was picked up by a friend, is like a sewing 101 course for beginners, and one of the things I dearly want to do this year is to start at the beginning and, with Betty's help, follow it in order.  At the end, I think I'll be a much better seamstress and of course have a wardrobe made to fit my body perfectly.

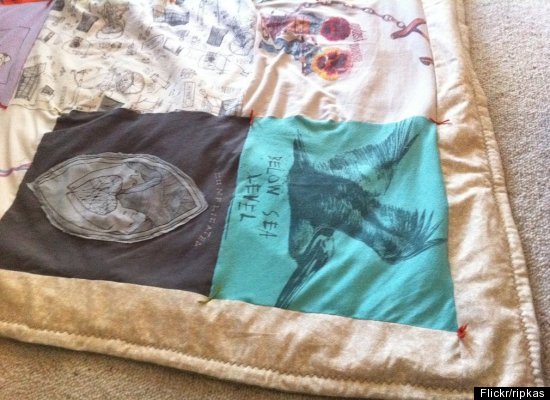
Make a tee shirt quilt.  Several sites have instructions on this, and I plan to follow a mix of traditional quilting and the instructions in Generation t (love this book!).  And if this is a way to preserve something for an eternity, why don't I..


...make an Infinity Dress. The latest issue of Quick Stuff to Sew has an infinity dress pattern that I am dying to try.  In fact, I am dying to try a LOT of things in the mag, and elsewhere, but I figure things that are a day project don't need to be listed here.  Inspiration is everywhere, and one site I'm often inspired by is BurdaStyle.

Talea
 
Talea
Malissa


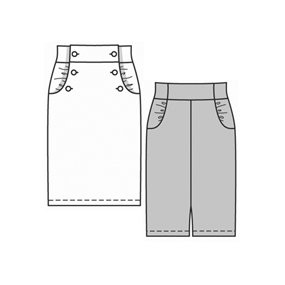
At least one of these projects.  Ideally, I'd get to all three.  The Talea Skirt is already cut and ready to sew, and that leaves me deciding whether to do the dress or the jacket next.  Thoughts?

Overarching Resewlution

Learn to Knit
Make Something that Can Be Sold
Get 100 Followers
Have Enough of a Wardrobe to wear all my own clothes for 2 weeks

Friday, December 10, 2010

Doing That Thing You Do

by Kimberlee

One of the best things about doing a blog is that you have an excuse - even better, a reason - to surf the web for awesome stuff.  Another thing is getting to wax poetic and trust your readers to either read or scroll, whatever they want.

I've been so inspired by all the blogs and sites I have the pleasure of looking through and communicating with.  You artist-crafters from all over make such beautiful and lovely items, objects that make me believe in the essential good of human nature.  How else could there be so much beauty in the world?

As the holidays roll around, I think those of us who make things feel some added pressure to step up our craft for gifts, decorations, etc - and we really don't have to.  The basics, the things we are good at and are easy, are the best gifts to make.  Plus, everyone loves the essentials.

For those who sew

Zippered pouches make easy, useful gifts.  You also can opt for fancier fabrics, as you don't need to purchase as much. 

The Classic Tote Bag, is there anything it can't do?  You can use any fabric, alter the size, add trim, add pockets, pleats or ANYTHING with the classic patterns, and everyone needs more tote bags.

For those that cook

 Christmas Cookies are always a great bet, and I know that I always appreciate the time and effort put into making them. One of the things I like so much about getting cookies is that I get to explore other people's recipes, as I tend to make the same thing year after year. I am, however, making the above pictured Oreo Upgrade.

I am a sucker for Mason Jar Recipes.  They're easy to  make, economical, attractive and fun to get.  You can make both cookies and savory items, like cornbread.  Friends made us several cookie jars a couple of years ago, and we loved them.  I might make up some myself, this year.

For the Knitters

I can't speak by the way of patterns, but I know that hats and scarves are easy to make - and AWESOME to get.  Don't ever think because you have given someone a scarf or a hat, you can't do it again.  The more the better!  I love love love getting both, and it's not just because I live in Minnesota where it's Winter 2/3 of the year.  If you know socks, PLUS!

Fingerless Gloves


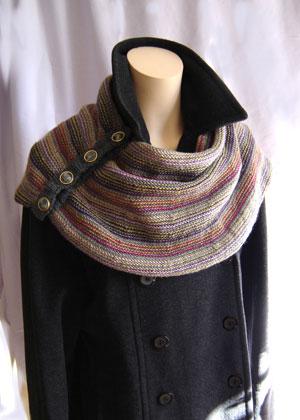
Beautiful Cowl


Flowery Scarf

Other Easy &Lovely Things from the Web

40 Edible Gifts


Ruched Headband

Peppermint Bark Soap


Felt Ornaments


a nice gift to make with children
Tutorial HERE