Showing posts with label furniture. Show all posts

Monday, March 21, 2011

Fudge Truffle Glaze (Drool...)

by Kimberlee

I'd like to straight up thank Stacy from Not Just a Housewife for the inspiration for this idea.  We found our coffee table at Goodwill, and I had been trolling the craft-o-sphere for ages for something to do with it.  When I came across her blog, it cracked me up how her table looked like a less-wide version of my table!  They are certainly from the exact same era.

So here it is:
Some cats come when called, Scrabble knows the sound of the camera turning on
Isn't it hideous?  Not even cool-hideous...just....it didn't even go with anything else.  And you have to tread carefully repainting these because they don't have clean lines, or even classic lines.  I guess it's "classic" in that everyone has, at one time or another, had furniture in their house that looks almost exactly like this.  And they are built so well that they just exist forever - never breaking, like an eternal Stonehenge of Bad Style.

But that's the upside, right?  They are well-made, which is why we bought it (that and the ten dollar price tag).  I was very close to just spray painting it black and calling it a day when I found Stacy's tute, and while her color/style scheme wouldn't work for my interior, I could see what the process would look like at the end, with a piece of furniture like mine.  Godsend!

I used Olympic Brass Mesh for the main coat, and PP Fudge Truffle for the glaze (mmmm....Fudge Truffle Glaze...drool).

First I took the doors off, and spray painted the table several coats of grey.  I've found that with more assertive colors, grey primer definitely produces better & richer results.  On its own, though, it's pretty damned ugly:

Hideous, but still a minor improvement


  So here's after a couple of. coats of Brasss Mesh:


OK, full confession.  At this point, I'm scared.  Like, legitimately thinking I've made a big decorating blunder,  I'm having the worst time ever trying to paint those weird post things, and frankly the color looks wrong wrong wrong.  I'm thinking I'm going to have a fried egg in front of the futon.  But I said a few prayers to the decorator's god (Interiorius?) and pushed forward.

And was happily rewarded!  The color dried into a mellow, golden corn shade.  I hadn't even meant for it to look like another kind of wood, but it actually almost did.  Happy dance!

I have to admit, this was the fun part...
Distressing this was the most fun I've had with furniture in ages.  I used sanding paper for the corners and edges (and those damned legs), and a hammer and chisel for the scratches.  Then I glazed it inside and out with the Fudge Truffle (drool), applying and wiping off with a flannel rag.  So here's some shots of the final results!


I was especially happy with how the door turned out.  The handles were painted gold using some craft paint

My favorite corner!
My yarn basket looks so pretty in there
The whole shebang!
So I'm pretty happy with it, especially given this being the first time I've ever glazed a piece of furniture, although I'm definitely using this method again.

I've got some fun things coming up for you here in the future.  We just started our plants indoor, which will eventually be planted in our first community garden experience.  I also have some of my first knitting stuff to show you which will coincide with another giveaway, and I'll be starting to put together my ren faire dress.  The biggest news is that I'm settling on my items for opening an etsy shop, and hope to open that soon.  And we're almost to 50 followers, a fact that overjoys me!  Take care guys, and if you've made it this far down, please leave a comment.  I lovelove getting your comments, they make my day.
Will pimp Scrabble for comments

Monday, February 21, 2011

Tutorial: Optimizing Miniature Upholstery Using Fusible Web

Magpie Shinies readers will remember that a few months ago I shared some of the fabrics that were going to become upholstery and other soft furnishings in the inch-to-the-foot scale Georgian Manor House which is the craft project looming largest in my life right now.

Well, with what we'll call a "budgetary lull" preventing me from doing any big things like flooring or lighting for a while, I thought I'd finally break out some of those old House Of Miniatures kits that I'm reworking for the bulk of the remaining furnishings. At pennies on the dollar they'll allow me to furnish the house in the style it deserves, but on the cheap compared to store-bought new miniatures for All. Those. Rooms.

In the process I discovered a terrific approach that I thought merited a tutorial, since it's a technique that I think has many potential uses beyond building miniature furniture.

A little history: House Of Miniatures, and indeed dollhouse miniatures as a hobby, peaked in the late 1970s and early 1980s. They had a full line of furniture kits from simple nightstands and tables to elaborate hutches and fully upholstered chairs.


You'll remember I declared that I was going to replace their default fabrics with some beautiful bits of silk I'd acquired, as indeed I did with my first upholstery effort, this Chippendale wing chair.


Because, there's no comparison between those results and what it would have looked like had I gone with the plain, drab blue cotton that came with every kit.


The project I'll document is the complementary Chippendale sofa. The first step is to press the fabric thoroughly with your steam iron.


Next, I'll apply fusible web - such as Heat-N-Bond - to the reverse of the silk.


In this case I started with one section, but ended up having to apply fusible to the whole length in order to meet the "seam allowances" for everything required. Be sure to set your iron to DRY for this process.


When cooled, peel away the paper backing and you'll see where your web, just like the wrong side of fusible interfacing, is ready to attach your fabric to whatever you need.

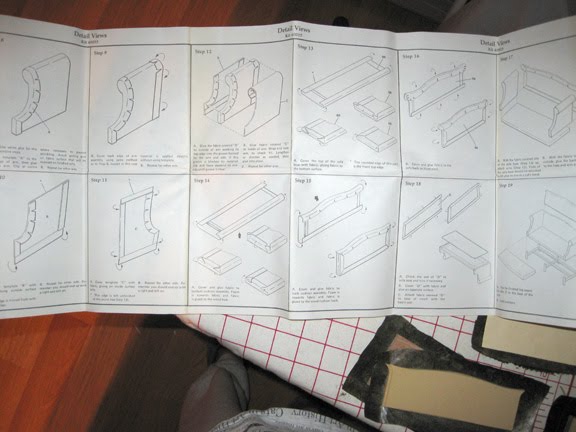
Next, I consult the part layout provided in the instructions and identify all my pieces, both the wooden structures and the cardstock cutouts that make short work of some of the more delicate bits.


The kits requiring upholstery include foam for the cushions, usually glued to a wooden base. In cases where the contents seem to have deteriorated too far to be reliable - remember, most of these kits are 30+ years old already, probably stashed forgotten in someone's attic until rescued and popped on eBay - I re-cut new foam from materials you can find at any Michael's or similar craft supply, but since these look well-preserved I'll go ahead and apply them as instructed. I do add another step of my own before I actually cover them...but I'm getting ahead of myself.


Now I take all my pieces that require covering with fabric and lay them out on the fabric + fusible web length, identifying the optimal position for each to economize on the fabric but still ensure I have enough allowance for the wrap-arounds required.


The next step is to cut them all out. In the instructions it will tell you to glue the cardstock templates, specifically, to the fabric. This is one of the steps that the magic of fusible web allows me to avoid for everything but the smallest pieces like the front of the sofa's roll-arms, to which I apply just the tiniest dab of glue to hold the template in place for cutting.


Now, cutouts complete - to the instructions! Back in the 80s, this would all be about the glue, glue, glue: apply the fabric templates to the parts, clip curves where you need to, and then find some kind of creative way to hold it down and WAIT FOR IT TO DRY. It would take forever...probably why the only kits I ever constructed before this were all wood and no upholstery. Contrary to popular opinion, I'm not very patient at all.


But it's 2011, and I have fusible web on my fabric. I knew, from past experience making fabric-covered puzzle boxes, that it could easily and tidily bond fabric to cardboard. So, I thought it stood to reason...why not to lightweight wood?

Job one is to break out my hand-held craft iron. You can't do close work like this with a full-sized iron, but a craft iron like this one from Clover - essentially a flat-paddled soldering iron with an adjustable temperature control - is perfect for this scale of project. Two important caveats for a tool like this: one, be sure to use the supplied stand to rest it on when not in use, or it will burn through your ironing board cover just as surely as your full-sized iron would; and, two, be very careful of your fingers whenever you need to hold down bits of fabric as you apply the iron for fusing.


I'll start with the fiddliest bit: the tops of the roll arms. A little glue attaches the lightly pre-glued template + fabric to the arm, and I hold it precisely in position.


Starting in the middle of the curve, I fuse the clipped edges to each side of the arm to hold them more or less in place while I continue the fusing process. In general I've found it works best to fuse the clipped curves first, before the straighter edges. It works brilliantly....and the best part is, I don't have to go and do something else for a few hours while waiting for glue to dry! Once the fabric and wood cool - a matter of moments - I can continue working with the same piece and move on to the next step. (Apologies for the blurry photo.)


The back of the arm is even easier. I can fuse the template - all fabric + web, no cardstock - directly to the wooden element before I start on the curves! No muss, no fuss, and wonderfully clean results, with sharp lines and no bleed-through from using too much glue.


For the larger cardstock templates, I begin by using the hand iron to fuse the fabric thoroughly to the cardstock, fabric side up. Be sure to do this right in the center of the template and leave the edges for later, or you'll risk fusing your piece to your ironing board.


When it's time to fuse the foam-covered "cushions," I want them to be a little less spartan than the original, so I add one layer - only one! - of lightweight quilt batting. I find this gives me the "cushier" look I want without adding so much bulk that the components, which really are very precise, no longer fit together well.


After a couple of hours' work, all the components have been fully fused and are ready for assembly - a much quicker, simpler and more precise job than it would have been back in a glue-based world.


And at the end of my evening's project, all that remains for the next day is to finish the legs and glue the upholstered sofa to the base.


A few general hints for working with fusible web, if you haven't before:
  • Sometimes, especially when you're adhering fabric to another bit of fabric that's already been folded over and fused, the bond doesn't want to immediately "take." Apply some pressure to the desired point with your fingertips until the fabric cools a bit, and the bond will usually hold.
  • For cardstock templates, pre-clip to the edge of the cardstock for your curves. When working on wooden assembly pieces, first fuse your fabric to the wood, and then clip as you go.
  • Keep any extra bits. You may have dining chairs or benches you want to upholster to match, later on - I know I do!
  • Don't put the craft iron away when you're done with a project like this. They're very handy when you want to achieve a really precise point on a collar or a cuff.
I've been busy with soft furnishings for the Manor, too - next time, I'll share with you some of my results in a non-tutorial gallery!

Friday, February 18, 2011

Wonderful Gifts

by Kimberlee

(And I'm annoyed that I still haven't found the cord that allows me to upload photos into the computer.)

To be honest, I was sort of not looking forward to Valentine's Day, just a little. Don't get me wrong, I LOVE V-day, despite my tendency to be a cynic, but I had chemo scheduled for that day, so I was feeling pretty sorry for myself.  It generally stresses me out to go out to dinner on V-day evening (too busy), and I had felt too punked to go out the night before.  So yeah, I was feeling pretty sorry for myself.  But the atmosphere in the clinic was very festive; there were Valentine's presents being given out, and one of the patients made cookies!

Since it usually takes a couple of hours for the chemo to really set in, we stopped at the Goodwill on the way home.  I love second-hand stores, as I am sure most of you do!  I wish I could show you the lamp base and glasses I scored! (Soon!)  My husband found and pointed out the small pattern section to me, and wow did I hit the jackpot.

In addition to being a second-hand store junkie, I am also a Ren Faire junkie, and just this last year I finally made my own costume, so I have been on the lookout for this year's, and I found it in the discontinued Simplicity 8735, which was inspired by the movie Ever After, the costumes in which were in turn inspired by the drawings of Albrect Durer.


Simplicity 8735

The "Breathe" Dress, pattern A 
The dress I really want to do is Dress C, the one in the upper right-hand corner.  I fell in love with it immediately, although I guess it was the least popular, as I was not able to find any finished costumes representing it online. I've had a lot of fun looking online at Jacquards and Tapestries - I usually don't have a reason to!  By the way, if anyone knows a great and inexpensive place to buy those fabrics from, I'm open to suggestions...

We also found this Edith Head Vogue pattern from 1972, and I had to snatch it up, too:

Very Easy?  I'll be the judge of that!
I adore this pattern.  The dress is an absolute classic, and the kimono jacket is perfect, and it was a dollar.  How much better can you get?  I like the longer version, personally.

OK, I have been pining for this piece of furniture at Target for over 2 years now, and I was going to wait to show you all how it goes into my decor, and I still will, but I can't wait to show you!  This was my big Valentine's Day gift:

Art Deco!

Isn't it adorable?  The bedroom is decorated loosely in an Art Deco/French style, and this fits very nicely into that.  To be honest, I tried to find a place in the living room that it would fit so I could look at it all the time, but had to give in to where it wanted to live.  I can't wait to show you how it looks all accessorized and in its home!

It's just awesome to wait so long for something that you love, and to be totally satisfied!  After 2 years, we kind of got the clue that it was never going to go on sale, much like the Converse tank tops (I know Target, LOL).

The last thing I can tell you about without needing photos are my plans to open an Etsy shop!  I'm at the pricing/gathering supplies stage right now, so we are a ways off, but I'm totally excited about the products I have decided to make and sell.  I don't want to get into too many details, but it will be a mix of affordable beauty products and handmade goods, as well as a few gift baskets because I think gift baskets are the finest things, ever.  I'll have to do a post sometime about how much of a sucker I am for gift baskets - I even like the ones the grocery stores have (fruit and nuts).

Well, since Scrabble was such a hit last time, I thought I'd start winding up posts with a photo of her.  Take care, everyone, and talk to you soon!

Scrabble on the Patio

Wednesday, December 22, 2010

A Home Made by Hand

by Kimberlee

One of my favorite things is seeing a creative home - I love walking into someone's living space and seeing it filled with objects that are handmade, altered or are used in unusual ways.  I am blessed to live in such a place, and to know & love so many creative people.  Today I'm focusing on some of my own objects, and in a following post, the objects from others.

If anyone wants a tutorial of anything presented here, feel free to ask via the comments section.


I love birds.  This garland is made of felt red-winged black birds.  They have bright button eyes.
 
Yes, it's a cow skull.  Many, many years ago, a boyfriend purchased a used car and found said skull in the trunk.  So he gave it to me, and since then it has been lovingly called, "The Room God."  He's been decorated in a variety of ways and, much like the Mannekin Pis, is sometimes dressed for the holiday season.

Currently, he is whitewashed with black horns and carries the motto "Lasciate ogne speranza, voi ch'intrate."

 I wishwishwish I had a "before" of this dresser.  I found it for big trash day on the side of the street in Hartford, CT.  If I recall, it was painted black (badly ) and had herringbone wrapping paper modge-podged to the top, and the knobs were the cheapest white plastic you could find.  But it was old, so it had a solid wooden back and dove-tailed all wood drawers, in short a really well-made piece of furniture.  I took it home, cleaned it up, painted it with several undercoats and this beautiful shade of red, and gave it new pulls.

Then, just a short couple of weeks later, I moved out of this house, and the dresser lived in a small storage closet in a U-Haul in the middle of nowhere in Connecticut for about a year and a half!

My wonderful father drove all the way from Southern Illinois to Connecticut, retrieved it along with several other items, then drove all the way from there to here in the Twin Cities region of Minnesota.  I cleaned it up and added beautiful golden rub-on birds found in the scrapbooking section of Michael's.  It now holds patterns and pattern pieces.

A hanger, purchased raw and painted bright blue.  The deer are fuzzy stickers!


One of my early attempts at flower-making.  ALWAYS keep the magnets from those fridge notepads (best found in the dollar section of Target) because they are great for making impromptu fancy magnets.


The bathroom can be difficult to decorate with wall art, if only that things get easily ruined in the moist environment.  Photos melt to the glass, etc.  This piece of art, which looks like hieroglyphs on papyrus, are simply acrylic-painted stamps on craft paper.  I think I am going to do another, with different stamps, but on fabric instead of paper.  I love this piece because the more the bathroom makes it look older and beaten up, the more authentic it looks!

I found this awesomely shaped branch during a fun time my husband and I had camping with friends.  I cleaned it up with linseed oil, and my father added hangers and hooks.  We have it right next to the front door, and hang our keys on it.  (The candles are from this year's Ren Faire)


This is the rug that wanted to be a bowl.  I love The Generation T books, and this is the braided rug project.  But no matter what I did, the rug desired to become a bowl - so I just let it happen.  It now sits on top of the fridge, holding onions and potatoes. 

Flower Pens.  A classic.

These chairs were part of a dining room set my wonderful husband and I found at a yard sale.  The seating cushions were predictably bad (once again, sorry for no before shot).  Many of you probably recognize this fantastic IKEA fabric - it really brought the chairs back to life!


Thank you so much for visiting me, and I'd love to hear about any of your favorite projects involving altering home objects.