Showing posts with label knitting. Show all posts

Tuesday, April 19, 2011

LAST CHANCE for GIVEAWAY

Please enter our knitted bag giveaway! You have until Midnight tonight, and I have decided to include a special, secret sparkly nested inside.

I'll accept comments on the original post or on this post.

After that, go on to check out the Ralphy Fan Tutorial below this post - it's another AMAZING one!!!!

Please sign up for the giveaway, as Scrabble has threatened to systematically EAT my craft supplies if you do not

Tuesday, April 12, 2011

First Fifty! (Plus Giveaway)

Wow, FIFTY followers!  Thank you soooooo much for believing in me enough to befriend my new, little blog.  Ever since we've started, we've explored Ren Faire Wear, low-sugar cooking, Anthro knock-offs, first dress forms, first dresses, upycles, remakes, and more, and I appreciate you being there with me every step of the way.

Especially through some of the darker, sadder parts, like crafter's block and listening to me talk about my long, ongoing fight with breast cancer.  Thank you, all.

So one of the new things I have learned is how to knit!  I can still only do squares and rectangles, but I have gotten pretty good at patterns, and am currently knitting cables.  I think I am going to go with my original plan, and knit a bunch of squares with different textures, patterns and colors, then sew them together to make an afghan.  A sampler, of sorts.

So for a giveaway, I am giving this knitted pocketbook, made by me!


To Win:

Just leave a nice comment, either about me or my blog!  I want you to be my Google Friends because you like my blog, so following isn't necessary for this giveaway.

for an extra entry:

Mention this contest on your blog, then come back and tell me, and you get another entry.  If you don't have a blog, or want another entry, mention this contest on Facebook (and come back to tell me about it).

This Giveaway ends Tuesday the 19th.

So that's it!  Once again, THANK YOU to my first, special 50.

Scrabble, thinking fondly of all of her wonderful Google Friends....

Wednesday, January 19, 2011

That Crazy Hat Lady

 By Kimberlee

I am sorry that it has been so long since my last entry, I have had a number of difficult days related to my cancer treatment.  Also, there was a frantic hunt for a Chinese Frog Closure....let me say I had no idea how difficult it would be to find a decent one, even on-line.  Only in a crafting house would this be considered something of an emergency!  I finally tracked down a beautiful vintage one on etsy, and decided on it at the suggestion of my husband (who so rarely offers his opinion on matters of dress or notions that I had to).  ANYwho, now I'm waiting on its delivery to do the final stuff on my first big project on the year.  I can't wait for you all to see it!

I've mentioned before that I LOVE hats.  Love them. I don't have as many non-winter hats as I'd like, but Winter hats are a true obsession.  Scarves & gloves as well.  So I thought for fun, I'd pull out part of my collection for you to see.

My furriest, most wonderful of the Target hats.  Works wonderfully against Minnesota Winters.

Handmade by a group who makes hats for chemo hair-loss.  I plan on profiling them in the near future.

I lived in NYC for 13 years, this is my "oldest" hat, purchased at a store in the Village called "Himalayan Visions."  It's Tibetan Alpaca!

A Hallowig made by the amazing Eileen.

The newest beauty, made by the wonderful ladies at Girls with Good Taste

Another from Target.  It's one of those hood/scarf
combos but the killer is the puffball at the end of each hood pull.


A "vintage" scarf/hat (it has a teeeeny bill!) combo from Urban Outfitters.  I used to have more UO hats, but 4 moves + divorce + accidental stuff in the purge = oops lost it!

A Side-View Gallery of Skull Caps, Mostly Hand-Made


 OK, 3/4 view.  One of the most joyful hand-made caps ever!
A gift from my oldest (since grade school!) friend.  There are 2 other knitted flowers, they are all interchangeable.
Stripey awesomeness.
OK, I love stripes on hats.


This one is marbled and slightly felted.  The lovely scarf came from my friend Amy, who grew up in MN and understands.

The hat is awesome, but I really wanted you to see the gorgeous eternity scarf made by Eileen.  I even use it for a hood/scarf combo!  Look for a decent shoot of the scarf soon, done by my husband, who is MUCH better than me at photography.
Purple Marble.  Purple is such a glorious color!
Thank you so much for visiting Magpie Shinies and checking out my hats & scarves!  If you have an obsession with winter accessories, I'd love to hear it.  I'd also love to hear any stories about going to the ends of the earth to find that perfect notion.


Much Love!

Monday, January 3, 2011

New Year's Re-sew-lutions

by Kimberlee


One of the things I have trouble doing if finishing a project.  I'll get discouraged and put it away, then start something new, or more likely become excited about something new!  So here are my Re-sew-lutions for sewing that I will finish this year.  It should be interesting to see what I manage to hold to.  In no particular order!


This is Butterick 5398, one of the first patterns I bought and possibly the best bang for the buck (literally, it cost a buck), considering it is an entire wardrobe.  I've tried to make the very easy dress a few times - once I was short on fabric after I had cut the rest, once I cut all the fabric but it fell apart during sewing, etc etc.  But I love these designs, and want to do them all (in the same colors, too) as the patterns - except for the pants, which are no great shakes.  I also want lime green flats now, too.

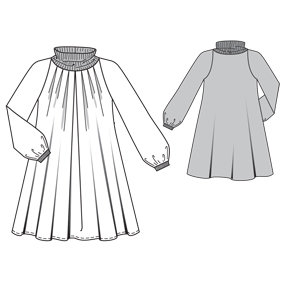
The Yellow One from B5045. I don't know what it is about how the yellow is cut, but it looks super comfy.  I want to make it out of some fabric that is both casual but fancy at the same time, and I'd be happy to take ANY suggestions!

Something awesomely retro. I have yet to make a retro item (Ren Faire notwithstanding, but possibly too retro), but I really want to make something that looks straight out of a classic movie.  I love these robes(B5152), and I'd get a lot of use from them, as I practically live in pajamas. It would be really cool to make a fabulous retro party dress, too, which brings me too...

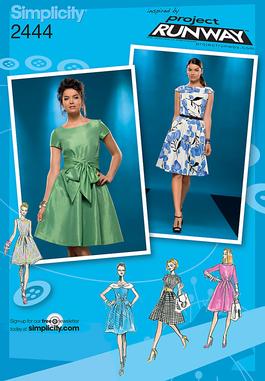
I've had this pattern, Simplicity 2444, for a very long time as well, but I've been waiting for a dress form to finish it.  Now that I have one, and a muslin for the bodice, I'm excited to make a custom fitted party dress.  The PR patterns are a little funky, more exactly the instructions are, and were definitely too much for a beginning sewist.  I'm making the pink dress in the drawing, as I'm not a "huge bow" kind of gal.  More power to you all who are, but it's not how I roll.


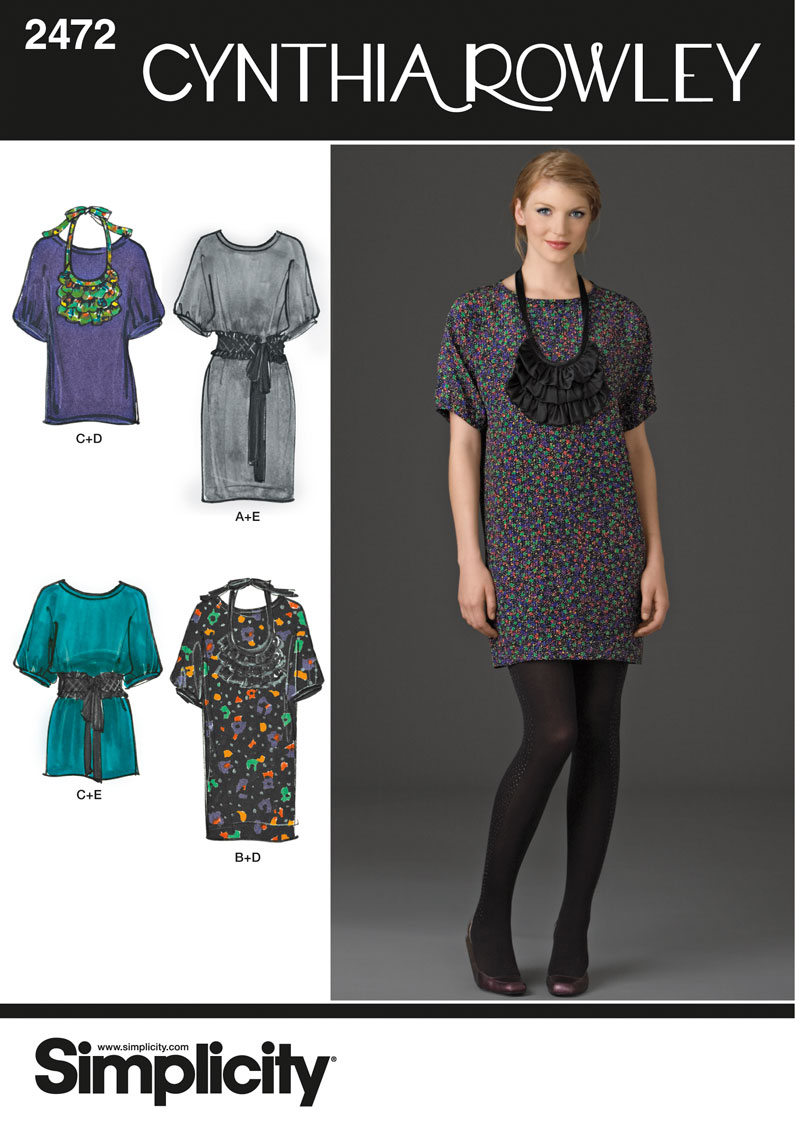
This dress should be easier but I may be cursed.  S2472 is a dress/tunic option with a really cute belt.  Like, supercute.  Why did mine wind up looking like a tshirt and why are the instructions for the belt mystifying? I'm open to any fabric suggestions!  Much like this pattern, the next re-sew-lution is mostly made:

I was into capes before anyone else.  One of my most beloved pieces of clothing is a poncho/cape I bought at Top Shop for 50 lbs (when one pound = 2 dollars!).  I knew it would be a while before I was on a High Street again, and it was so perfect and army green, and then I had to go get cash out because there's some chip in English credit cards that American cards don't have, etc etc. But this was over 3 years ago!  Now I want to make this cape, and C (the blue one) is at home, all cut, but for some reason there is no lining, and without a lining it has about a two week wear-season here in MN.  So I created a lining which I have to figure out how to put in, and want to make a hood to go with it.  I don't know how to make a hood, so I have been studying the hood on my beloved cape like crazy, hoping to match it.


A great pair of pants.  I'm terrified to make pants.  I just don't know how to.  Before the end of the year, I will make a pair, learning how to...


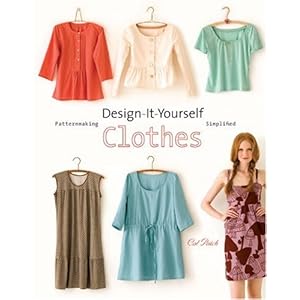
...by following a book learning course.  This wonderful book, which was on my Amazon wishlist and was picked up by a friend, is like a sewing 101 course for beginners, and one of the things I dearly want to do this year is to start at the beginning and, with Betty's help, follow it in order.  At the end, I think I'll be a much better seamstress and of course have a wardrobe made to fit my body perfectly.

Make a tee shirt quilt.  Several sites have instructions on this, and I plan to follow a mix of traditional quilting and the instructions in Generation t (love this book!).  And if this is a way to preserve something for an eternity, why don't I..


...make an Infinity Dress. The latest issue of Quick Stuff to Sew has an infinity dress pattern that I am dying to try.  In fact, I am dying to try a LOT of things in the mag, and elsewhere, but I figure things that are a day project don't need to be listed here.  Inspiration is everywhere, and one site I'm often inspired by is BurdaStyle.

Talea
 
Talea
Malissa


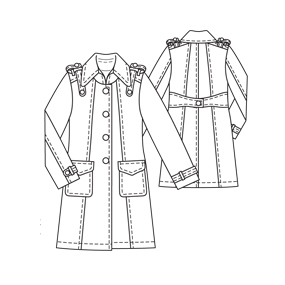
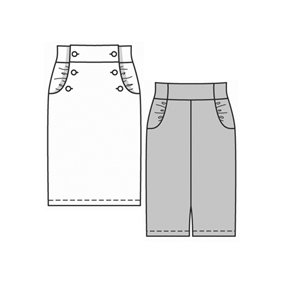
At least one of these projects.  Ideally, I'd get to all three.  The Talea Skirt is already cut and ready to sew, and that leaves me deciding whether to do the dress or the jacket next.  Thoughts?

Overarching Resewlution

Learn to Knit
Make Something that Can Be Sold
Get 100 Followers
Have Enough of a Wardrobe to wear all my own clothes for 2 weeks

Thursday, November 4, 2010

My Crafting Space

One of my big agenda items when we began house-hunting in Canada five years ago was to find a place with enough space for an office area that didn't take up what my husband called "his half" of the kitchen island, and for a sewing/crafting space that didn't have to be crammed into a spare bedroom, and that might even be able to accommodate an actual sewing cabinet, so for a change I wouldn't have to sit on the floor to sew and use my knee on the foot pedal.

Fortunately for us, what are known as "legal suites" are popular in British Columbia. These are separate, usually basement areas which are set up so that they can be outfitted as an apartment complete with living area, kitchen, bath and bedroom. Primarily rented to students, they are a great way to supplement your income or help with your own mortgage. The house we found had one such fantastic space. Drywall was already up everywhere but the ceiling, and plumbing was in place too. Even when we looked at it with the bare concrete floor, I immediately envisioned the home office, library, and teen "lair" that would fill the space, and I claimed what would have been the kitchen as my forthcoming studio.

Job one was to get the flooring down. We opted for a woodgrain laminate that husband did a beautiful job of laying down, and I took care of the baseboards. But I hadn't exactly been lazy in the meantime - working from a copy of the original house blueprints and Lynette Ranney's Dream Sewing Spaces, I'd already begun planning.

More than sewing needed to be accommodated. As a quilter, a knitter and a beader...and a rubber-stamper and wheat-weaver and embroiderer and miniaturist and so on...it wasn't just a lifetime's accumulation of fabric that needed a home: it was also yarn, beads, notions, quilting stencils, and books on all of the above. So I began by portioning out the space as logically as I could, with dedicated areas and an eye toward making the most of each and every storage opportunity.

My original idea was to outfit the space with standard kitchen cabinetry, on the theory that this would make it easier to sell the place when we eventually downsize. But even with a discount cabinet warehouse just a few blocks away, this proved to be cost-prohibitive, and not an approach that would get me up and running smartly.

Instead, I opted for pre-fabbed closet units by Debbie Travis that were on sale at Canadian Tire. Shipping from Ontario took forever thanks to a snowstorm, but once they arrived the units were easy to assemble and position around the walls in a free-standing perimeter.


The shelves - with doors to minimize the clutter - would provide cabinet space big enough to handle larger lengths of fabric,


and the drawers would allow me to finally organize my smaller quilting pieces.


Open spaces between allowed for easy storage of button tins, embroidery threads, craft paints and rubber stamps.


I was even able to take advantage of an electric outlet that had been positioned to be at countertop height as a break between units, for hanging ironing board storage. (It's also handy for cord control when I'm pressing, versus a floor outlet.)


In addition to a separate organizer of wire baskets, yarn storage is easily handled in baskets on top of the units.

It was a wonder to actually be able to unpack and organize all my fabrics by type, in a way such that I could see all of them at a glance! For the first time EVER that I can recall, I don't have any of my fabric buried in a cardboard box somewhere.

I lucked out in terms of sewing furniture, too. A local sewing centre offered not only the perfect sewing cabinet (though mine has the drawers on the left, the door storage on the right, and a larger fold-out area at the back for quilting)

but also a splendid cutting table! It's usually open in my space (right now the Georgian Manor dollhouse is on it, though it will move to the folding table shortly for electrics to be taken care of), but can easily fold down if not in use, and the sliding sections and drawers house my fabric embossing stamps, a quilt in progress, quilting stencils and cutting mats, plus odds and ends of miscellaneous projects.

And, then, there were the beads. Small items, but still a big storage need. I ended up finding a solution at Best Craft Organizer when one of their two-pedestal crafters' desks went on sale at 50% off. It turned out that they were just across the Straits in Vancouver, so the components arrived in no time!


The dividers work equally well for vials of Japanese delicas and loose beads


and for sorting findings by type and accommodating strands.


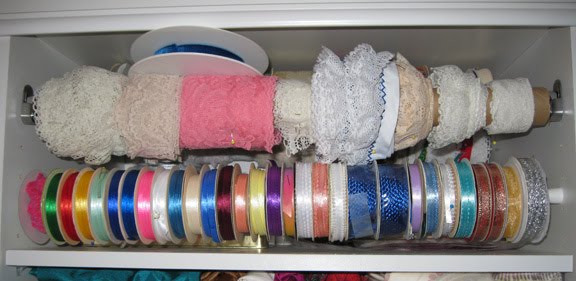
Existing shelves took care of the growing library of craft books. What were intended as hanging rods in the closet organizers gave spools of lace an organized home, and narrow tension-based curtain rods did the same thing for ribbons.


Other miscellaneous trims found homes in tiered hanging baskets, once the ceiling drywall and painting was complete.


The organizer my husband brought me long ago from a trip to Japan lives on the wall behind my sewing cabinet, next to the small computer desk that houses the old PC and the inkjet printer (for projects that require printing on fabric, and for access to my old quilting software).


Another free space is home to sewing-themed artwork and a couple of cross-stitch pieces.


Finally, it came time to pull it all together. I'd left a space between units which I filled in with two blanket chests painted white. One of these contains interfacing, and the other quilt batting. Project Runway themed fabric cushions turn it into a cozy window seat for planning the next creation.


More fabrics from the same collection became valances and were turned into cushions for the two stools that are perfect cutting-table height (using halves of zippers for the ties!)


and to slipcover the task chair I've had forever.


The finished result honestly is the crafting space I've always imagined, with a place for everything and - almost - everything in its place!


Thanks for the post idea, Kimberlee! I can't wait until you come for a visit and we can disappear in here for fabric playtime!